Why should we use Emunand on Nintendo Switch?
Once you have an Emunand setup on your system, you have a choice of which version of your system you want to boot into.
- System settings and installed data are separate from Sysnand
- Can have two different versions of the system firmware
- Play games online from your clean Sysnand
The concept of emuNAND was invented to limit the risks inherent in hacking when using a CFW. The principle is simple: it is to virtualize (or emulate) a NAND that will be dedicated to the operating system of the custom firmware (CFW). That is, Say you can play newer and online games with less risk of ban.
How can we play Emunand on Nintendo Switch?
Preparing your Sysnand for safe online gameplay
Now that we have a working emunand, it’s time to prepare the internal NAND on our Nintendo Switch to make it as safe as possible to play games online without being banned.
If you’re like me and you had been running plenty of custom firmware & homebrew on your device before you set up emunand, we will first want to restore our system to as clean of a slate as possible in order to wipe out all of Nintendo’s log files and telemetry.
Hopefully you learned early on the importance of creating a clean NAND backup before you got started with homebrew, as this will give you the best starting point with the lowest chance of being banned. If you don’t have a clean NAND backup from before you started hacking on your switch, skip ahead to the next section instead.
For those of you who do have a clean NAND backup, let’s go ahead and restore it on our Switch now.
You can use either the Hekate payload, or the Xecuter bootloader to restore a NAND backup to your devices internal memory.
Restoring a NAND backup with Xecuters Bootloader
Make sure you have placed your clean rawnand.bin file in your sd:\sxos\backup folder.
You should also place your boot0.bin and boot1.bin files here too if you’ll be restoring to a different version of the firmware than the one you have currently installed.
Power your Nintendo Switch on into the Tegra RCM state, and then start the SX payload either from your computer \ phone or with a USB payload injection dongle. Make sure you hold the volume + button on your switch so that you are greeted by the Xecuter boot loader options.
Touch the options menu again, and this time we will be choosing the NAND option down the left-hand side. From here, select the ‘Restore NAND’ button
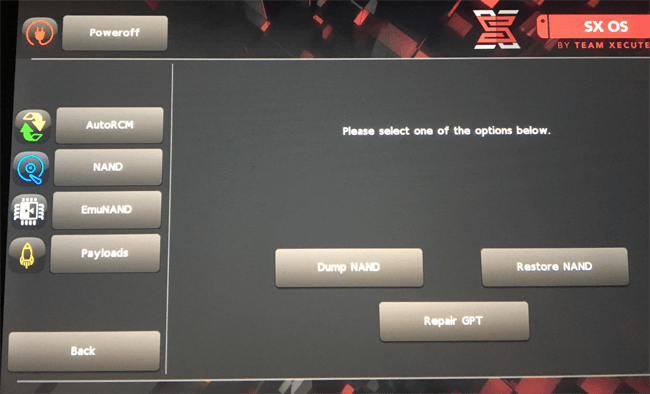
On the next screen, choose to continue. This will begin the process of restoring your internal NAND.
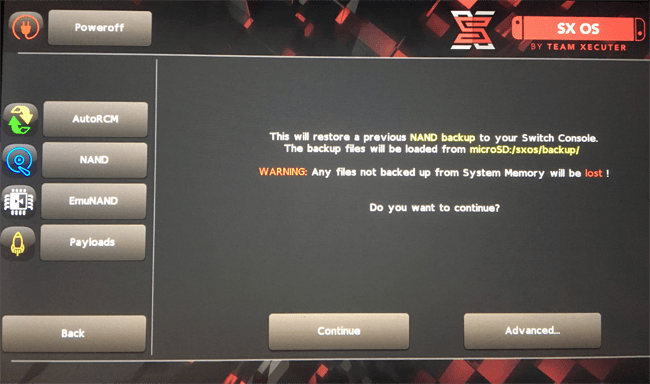
With that process complete, you may want to enable AutoRCM mode on your device again if you are maintaining an eFuse count. Or you can keep AutoRCM mode disabled to perhaps slightly reduce the risk of being banned. Then you can go ahead and power off your switch or boot into the stock firmware. Check and make sure the NAND restoration was completed successfully.
Restoring a NAND backup with Hekate
You will need to make sure you have your rawnand.bin file in the sd:\backup\lettersnumbers\restore\ folder. You should also place your boot0.bin and boot1.bin files here too if you’ll be restoring to a different version of the firmware than the one you have currently installed.
Boot your Switch into the Tegra RCM state, and go ahead and start the latest version of the Hekate payload. When Hekate has started, press the volume – button twice to select ‘Tools’ then press the power button to continue.
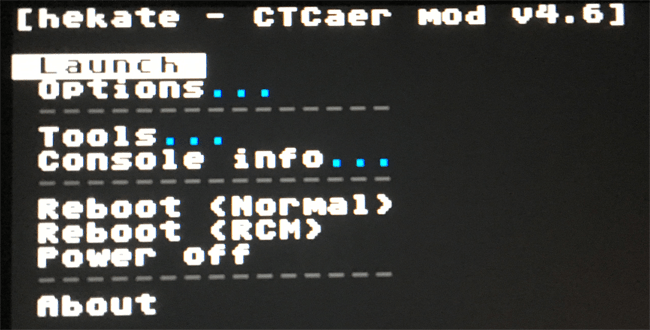
Next press the – button to highlight ‘Restore’ then press the power button to continue again
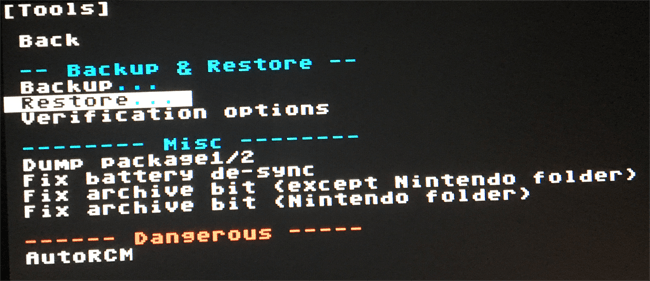
Next choose ‘Restore eMMC RAW GPP’ and press the power button again.

You’ll see a warning screen letting you know this is a dangerous procedure, after 10 seconds you can press power to begin the process of verifying and restoring your NAND backup. This takes a long time to complete, so again make sure your battery doesn’t run out before completion.
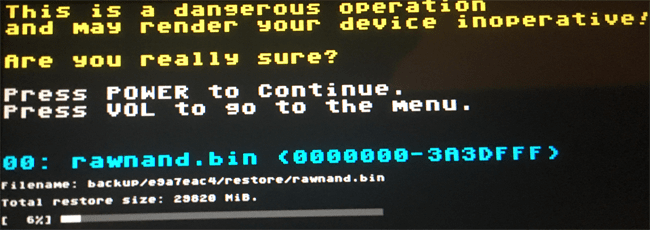
Optionally when this is complete, if you have restored a different version of the firmware than you had previously installed, you may also need to restore your Boot0 & Boot1 files.
You can do this by choosing ‘Restore eMMC BOOT0/1’ on the earlier screen.
With that process complete, you may want to enable AutoRCM mode on your device again if you are maintaining an eFuse count. Or you can keep AutoRCM mode disabled to perhaps slightly reduce the risk of being banned. Then you can go ahead and power off your switch or boot into stock firmware. Check and make sure the NAND restoration was completed successfully.
Enjoy your online gaming!
After you have restored your clean NAND backup to the internal sysNAND and have created your emunand on your microSD card, you’ll now be able to enjoy the best of both worlds on your device.
Just be sure to keep your emunand permanently blocking Nintendo’s servers (or totally offline) Then you can run all the .nsp & homebrew content you like without needing to worry about detection.
On your sysNAND side of the system, feel free to link your NNID and start using Nintendo’s online services to play your games online. Check out the lower section of this guide for some notes on keeping your chances of being banned as low as possible.

No comments:
Post a Comment